
Homelab Documentation: Hard Drive Organization
With everything that’s going on the world right now, I’ve spent an obscene amount of time at home…just like everyone else. The silver lining for me is that I finally have a little time to work on my home lab and make a few posts! Today, I’m going to run through how I document my hard drives. As with all things, documentation seems to always get left behind…until we need it. Well, I have a few drives throwing errors, so I really need it. So let’s talk about hard drive organization!
Hard Drive Organization?
I’ve always tried to keep up with understanding where everything is installed so that if I ever need to replace hardware, it should be easy. But, with a wife, three kids, two dogs, and a cat, I’m happy to even have a home lab at this point. If you’ve read much of my blog, you know that I use FreeNAS. FreeNAS is an amazing tool which is kind enough to e-mail you when your hard drives are starting to degrade! So when I see an e-mail like this:
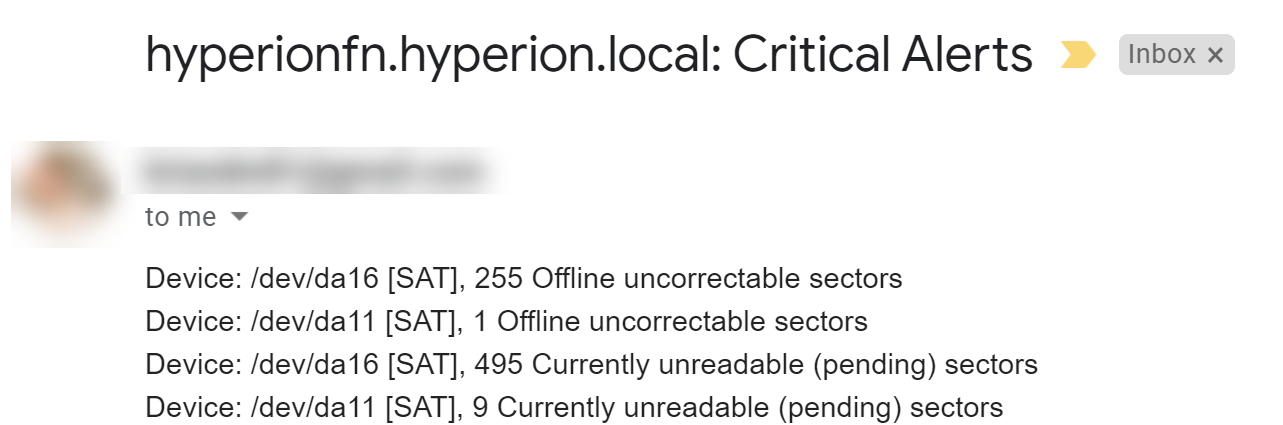
That can’t be good right? I’m generally of the school of that that i a drive is starting to throw errors like this, its only a matter time. Now…where on earth are /dev/da16 and /dev/da11? If only I had some type of document that would tell me this!
Hard Drive Documentation
I’ve always tried to at least have a basic Excel spreadsheet that told me where all of my drives are. I should probably label all of the drive cages with serial numbers as well, but since I haven’t done that yet, here we are. I found that my spreadsheet was horribly out of date. So I took this opportunity to update the sheet and make it look a little nicer. So what do we care about?
- Serial Number
- Drive Letter or /dev/xxx
- Manufacturer
- Model
- Capacity
- Interface (SAS or SATA)
- Pool (for ZFS)
- vDev (also for ZFS)
- Errors
- Installation Date
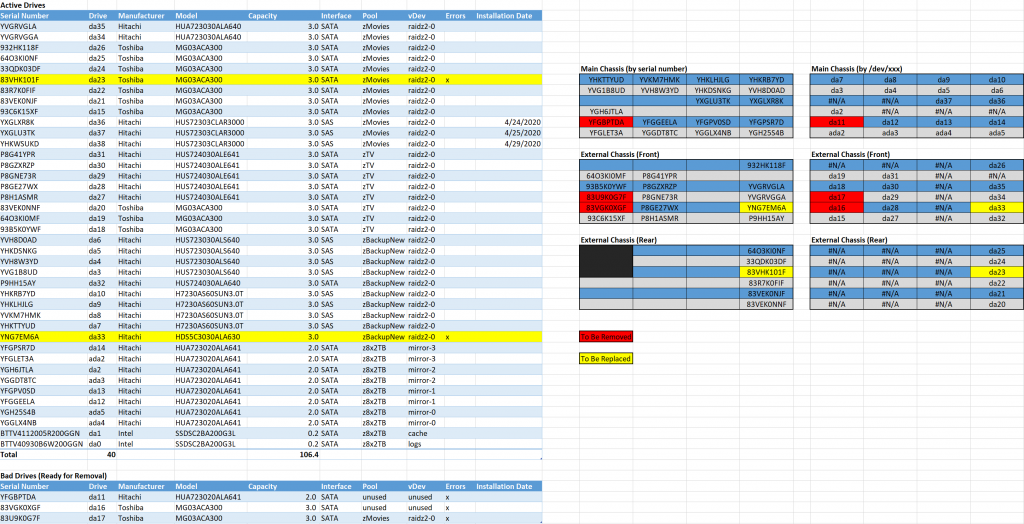
Let’s check out a sample:
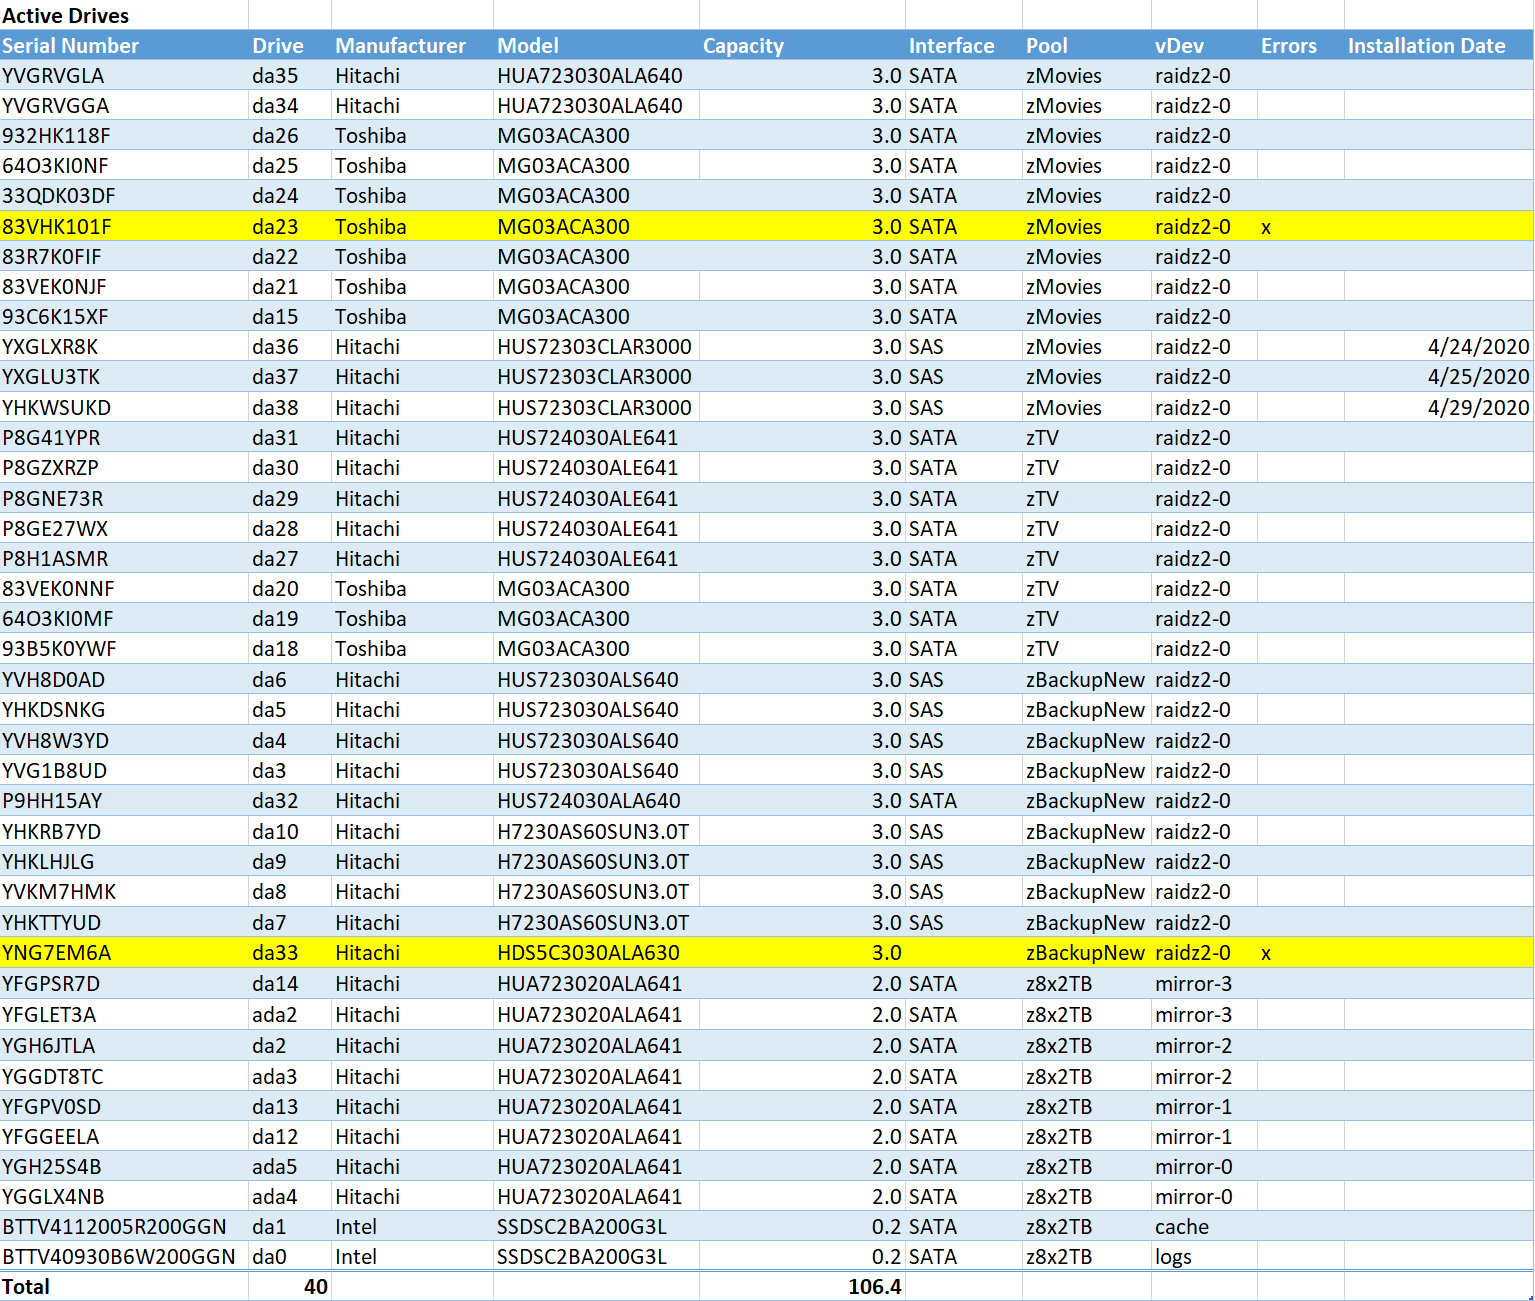
I put together a data table inside of Excel to give me nice consistent formatting, titles, and a total row. I’ve also highlighted drives that have been flagged with errors. That’s all great information to have, but it still doesn’t help me find the drive I need to pull. So I put together a map of my drives and linked it all together:
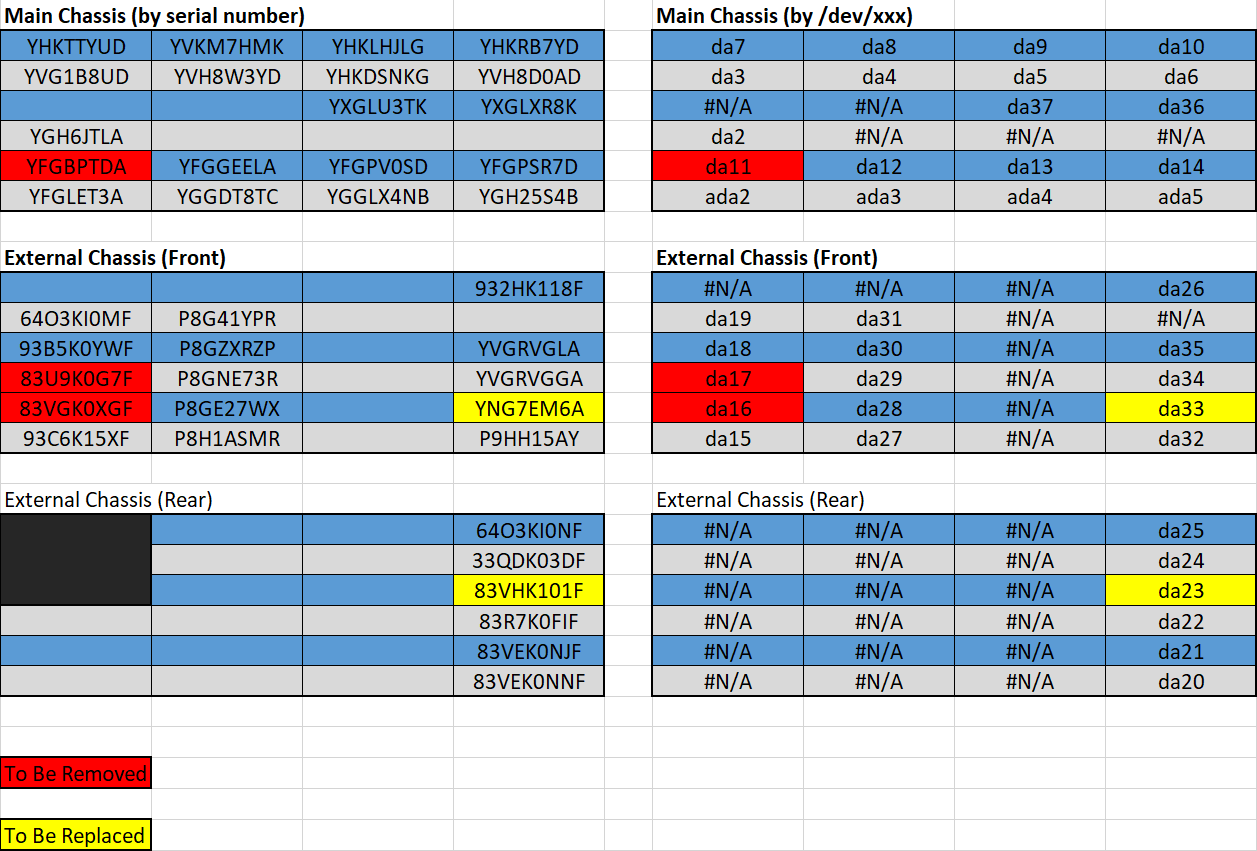
That’s more like it! I’ve set up formulas so that we can see the layout by serial number and by /dev/xxx. This should make it really easy to validate that I’ve used a real serial number (if its not real, it will say #N/A on the right). I also have a running table of drives that have been removed from the system. Just in case I ever fail to properly dispose of a drive, I don’t want it making it back into the rotation:

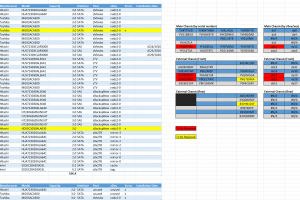
Hard Drive Dashboard
It may not be a real dashboard, but it looks somewhat dashboard like and let’s me know how much work I have to do! Here’s the final result:
 Conclusion

That’s it for today. You can download a sample of my document here for your own use. Hopefully this was useful for those wondering how others do hard drive organization and document for your homelab. Everyone shares the fancy pictures of the amazing homelabs out there, but I rarely see much beyond basic diagrams. Stay safe out there!